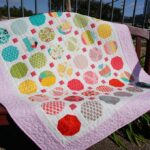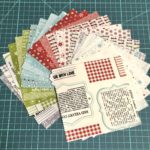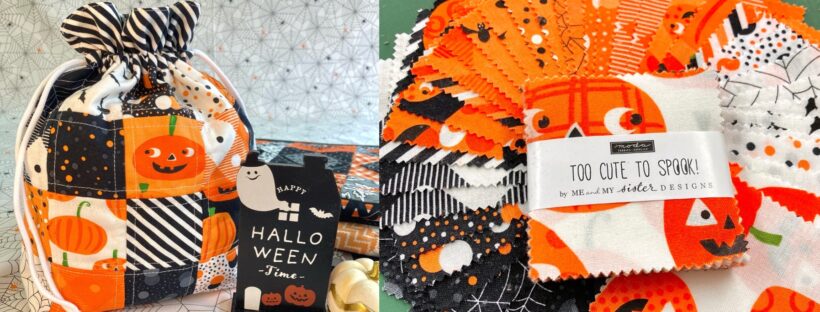
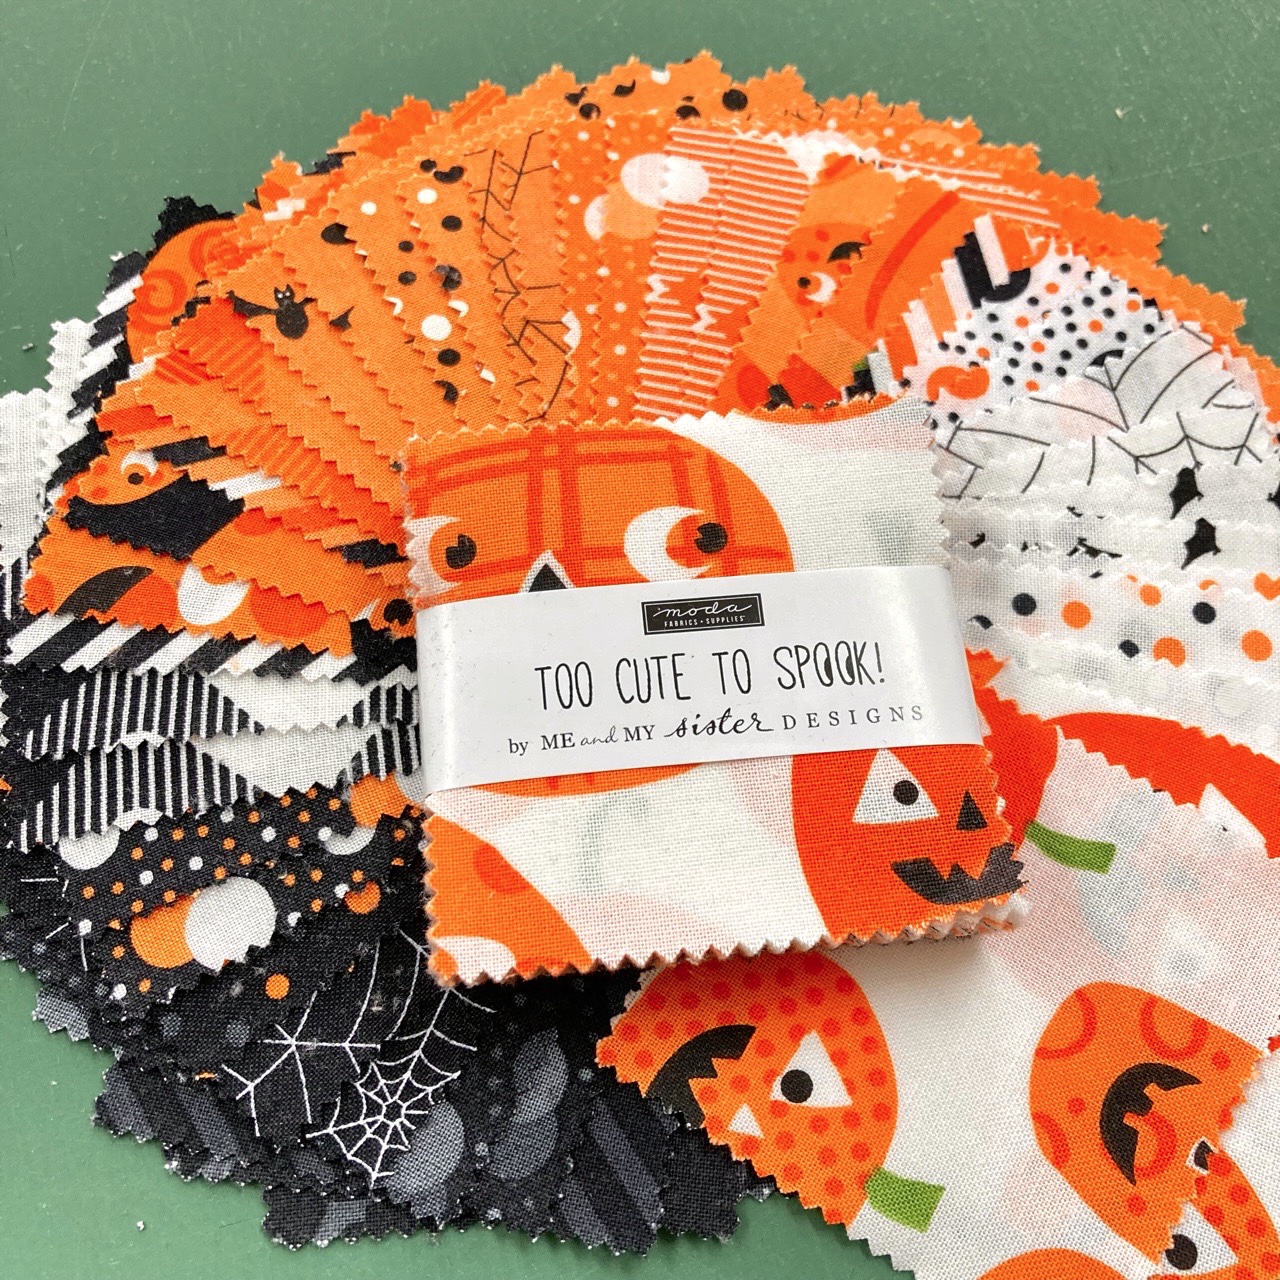
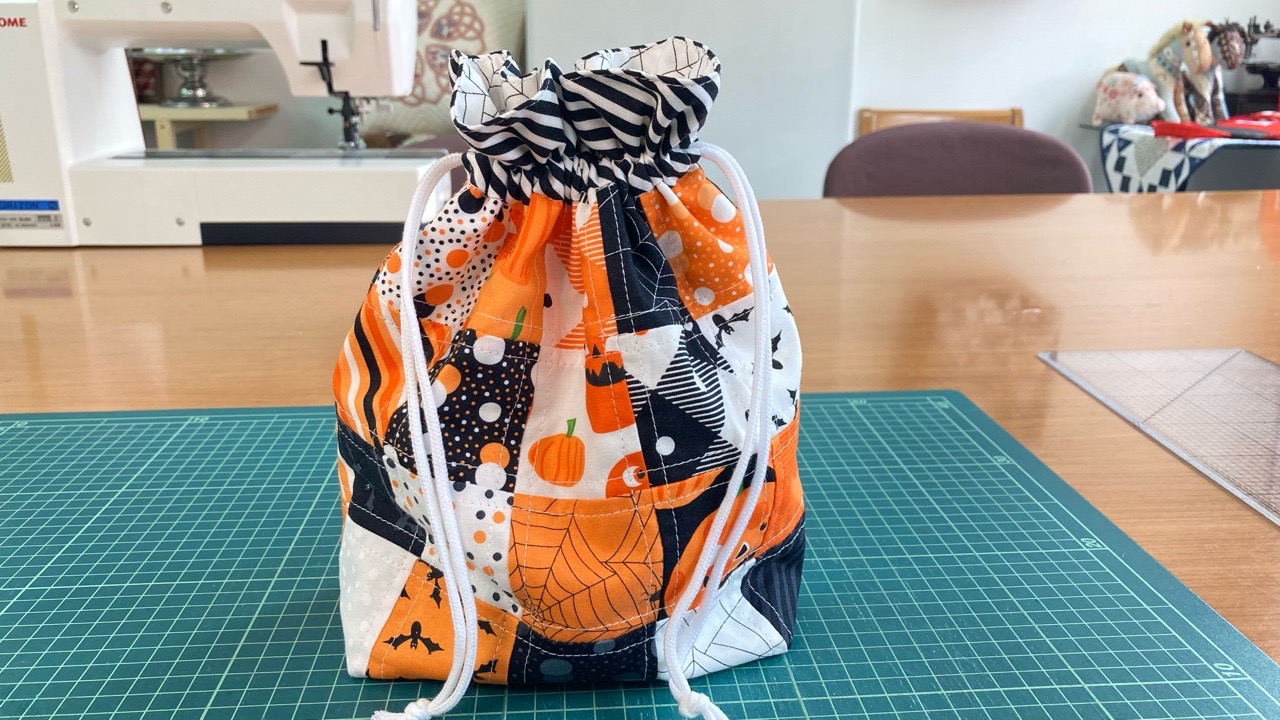
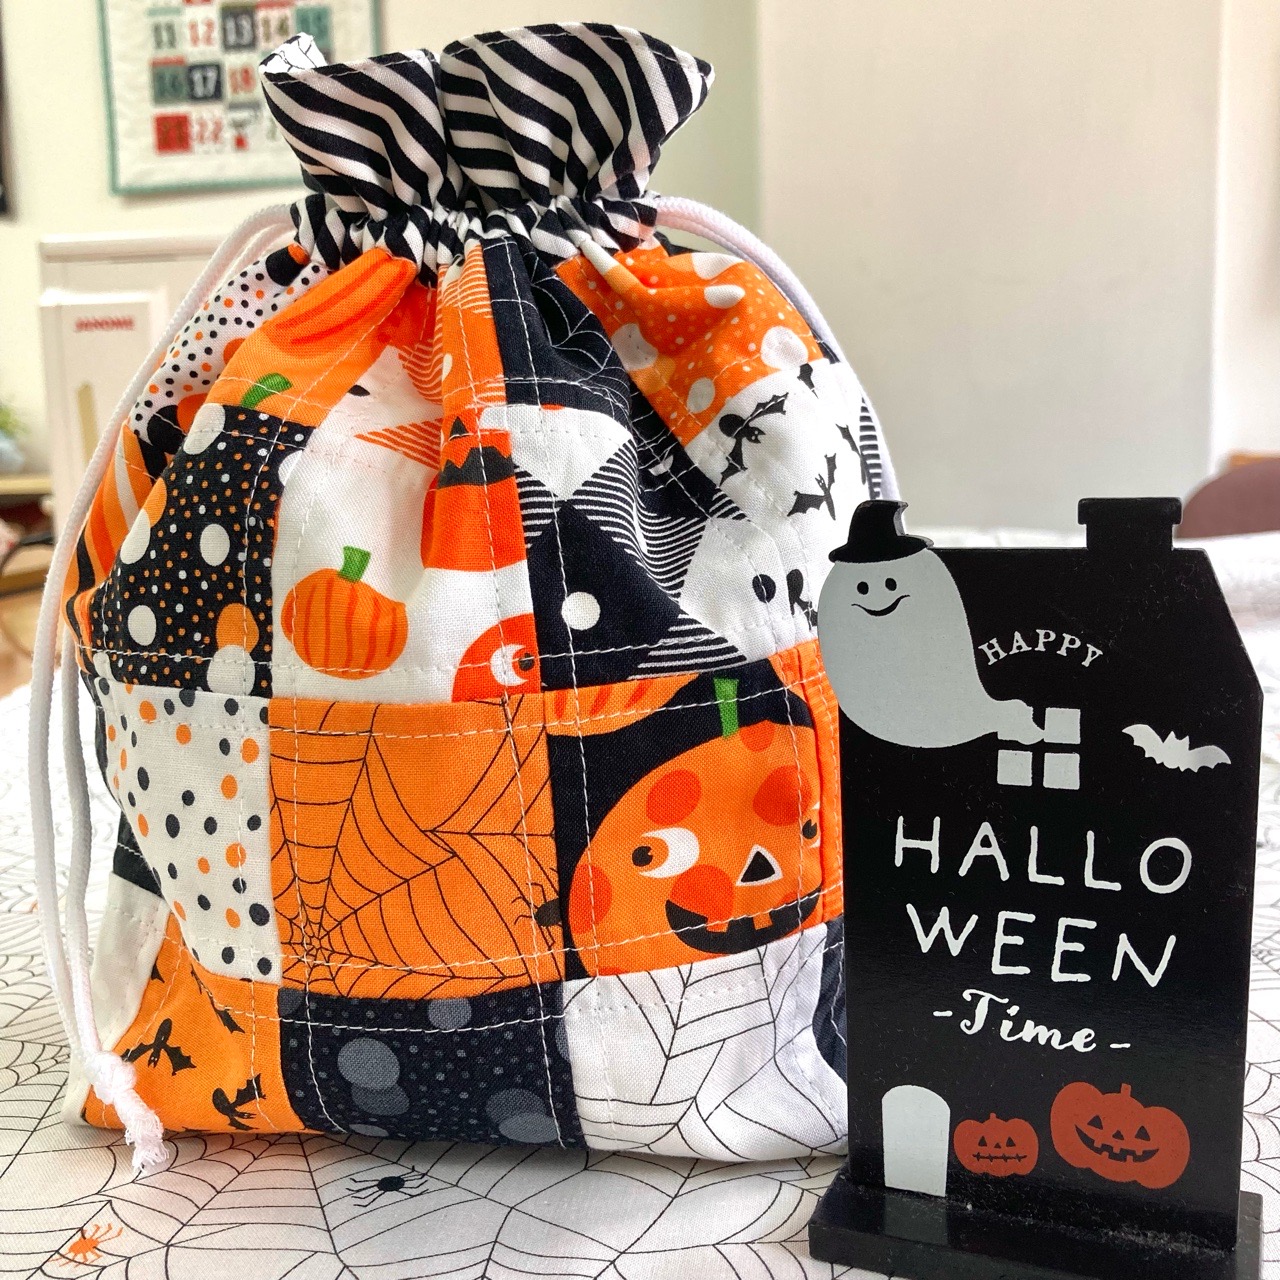
moda fabrics(モダ・ファブリックス)のミニチャームパック「Too Cute To Spook!」by Me and My Sister Designs を使って、巾着袋を作ります。完成サイズ(立体):約25×16×8cm
1/2I’ll show you how to make a little bag using the mini charm pack “Too Cute To Spook!” by Me and My Sister Designs for moda fabrics. Finished size: approx. 25cm(10″) x 16cm(6 3/8″) × gusset 8cm(3 1/8″))

こちらのMini Charm Pack(他すべての材料)は『ぱいなオンラインショップ』でご購入いただけます。
デザイナー”Me and My Sister Designs”さんの布生地ページはこちら
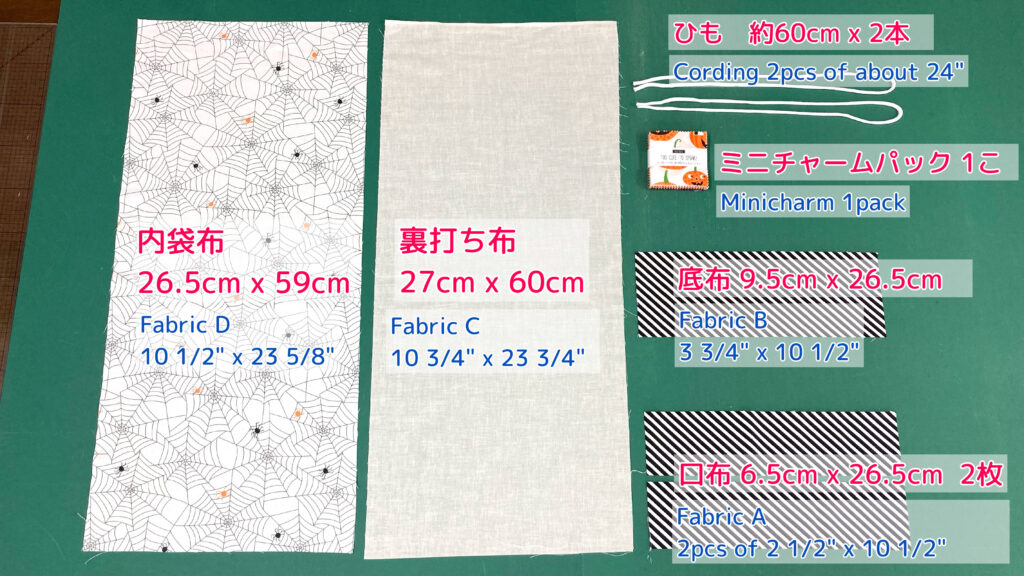
材料 Materials
- ミニチャームパック: 1パック(6.5cm平方42枚入り)
- 口布: 6.5cm×26.5cm 2枚
- 底布: 9.5cm×26.5cm 1枚
- 裏打ち布: 27cm×60cm 1枚
- 内袋布: 26.5cm×59cm 1枚
- ひも: 約60cm×2本(ひもが太い場合は70cm)
- Minicharm pack: 1pack(=42pcs of 2 1/2 inches x 2 1/2 inches)
- Fabric A for drawstrings channel: 2 1/2 inches x 10 1/2 inches /2pcs
- Fabric B for bottom: 3 3/4 inches x 10 1/2 inches /1pc
- Fabric C for backing of piece work: 10 3/4 inches x 23 3/4 inches /1pc
- Fabric D for inner bag: 10 1/2 inches x 23 5/8 inches
- Cording: 2pcs of approx 24 inches length
*Since they were converted from centimeters, it may be a halfway number.
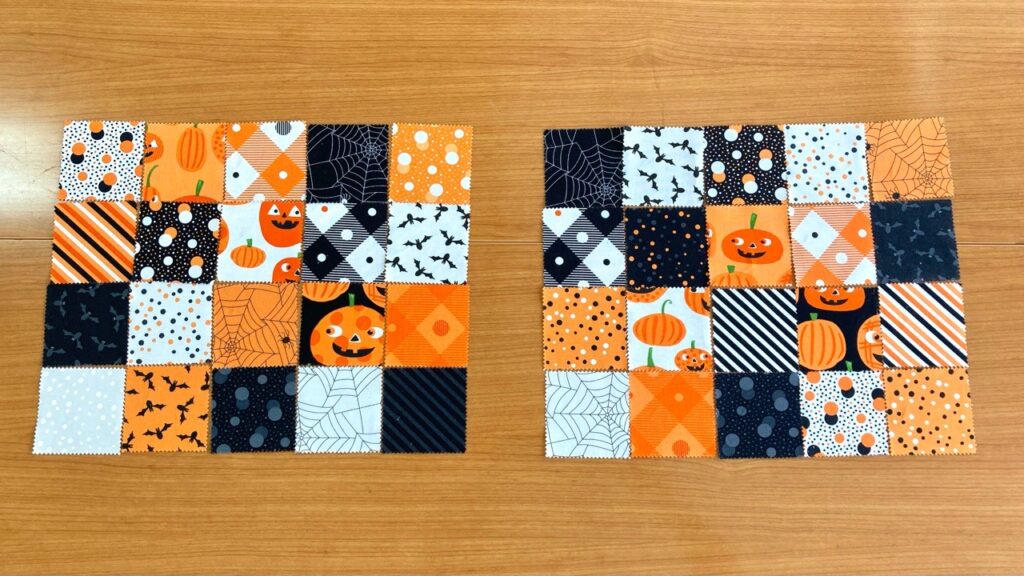
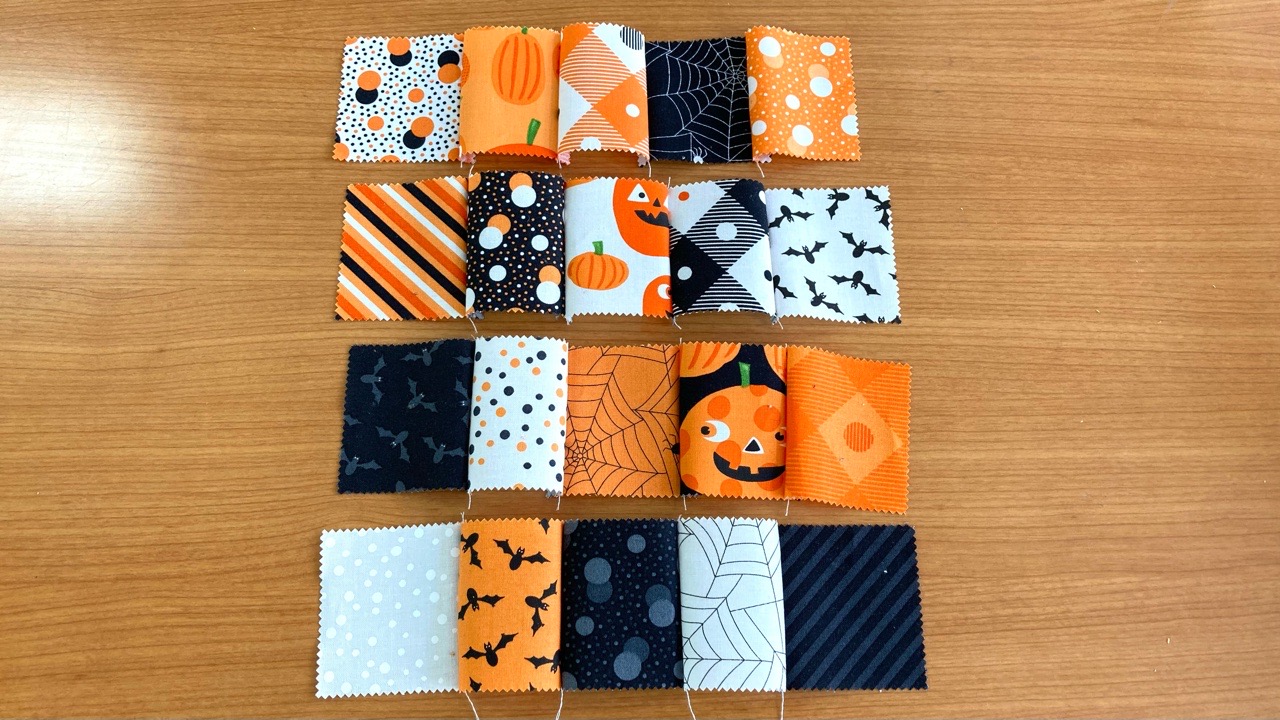
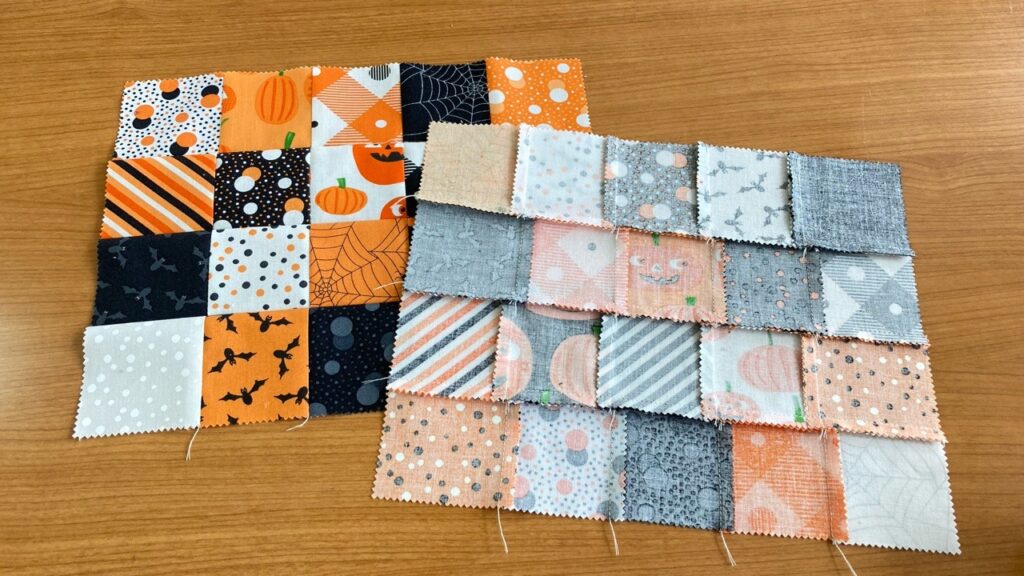
ピースワーク Piece work
ミニチャームパックを開封すると可愛い柄生地がたくさん入っています。これを横5×縦4に並べ、2枚つくります。
Open the minicharm pack and make two 5 x 4.
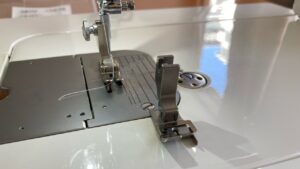
横一列に縫い、縦にも縫い繋いでいきます。縫い代は1/4インチ(6.5mm)で縫います。パッチワーク専用押さえを使用するか、または縫い代約7㎜になるよう調整してください。※以下参考リンク
Sew pieces with 1/4″ seam allowance. You can use 1/4″ foot for your sewing machine, or move the needle position 1/4″ to the edge of normal foot or put marking tape 1/4″ from the needle position.
ミシンキルトは7mm(1/4インチ)エッジが基本!
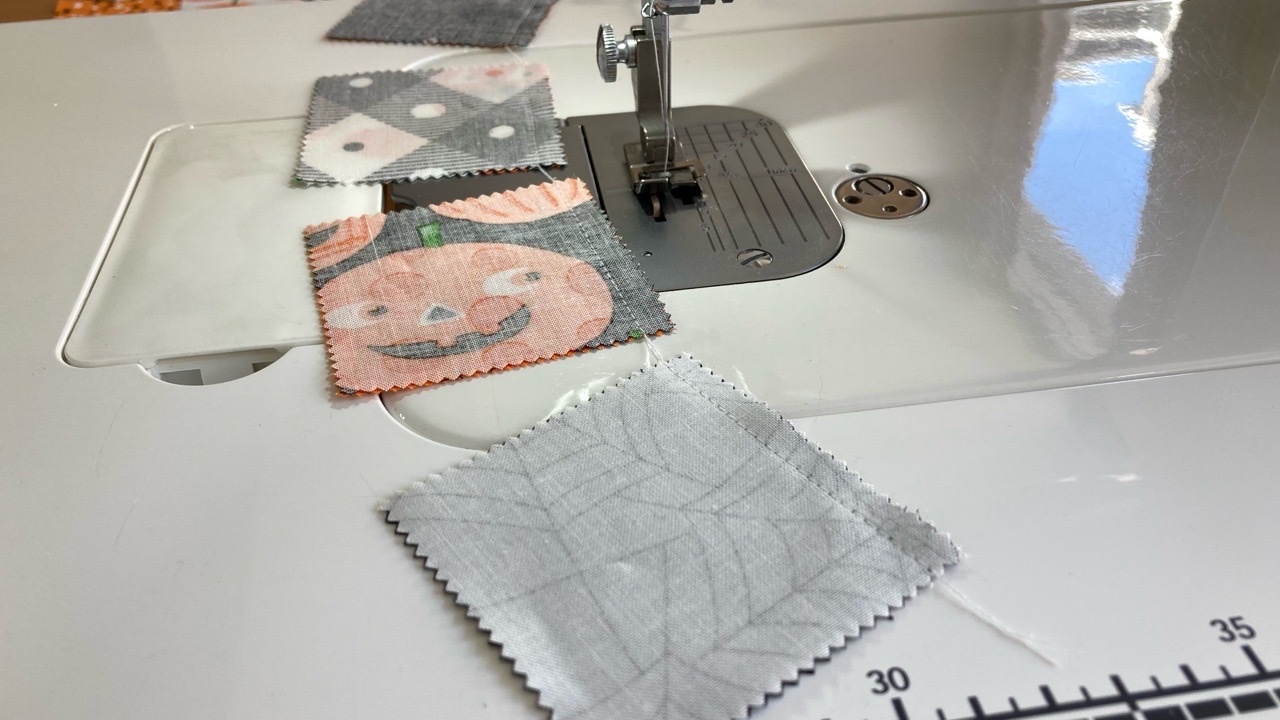
2枚ずつチェーンピーシングで縫っていき、それらを合体させていけば、配置が崩れにくいです。
Sew two pieces in a chain, and combine them. Make horizontal rows.
アイロンで縫い代を倒します。一行ごとに右、左、右、と交互になるように片倒しにします。
Press seam allowance in alternating directions.
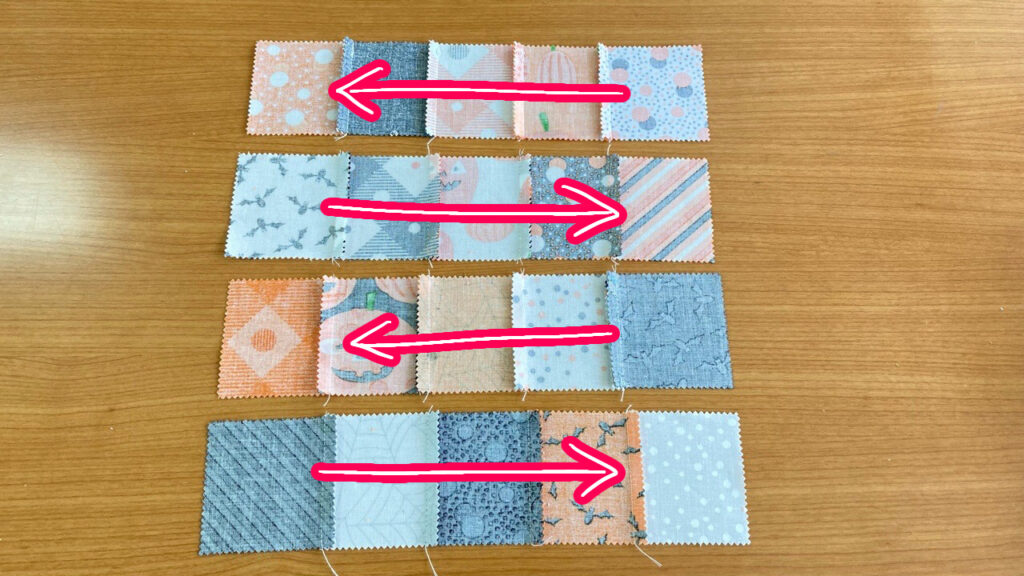
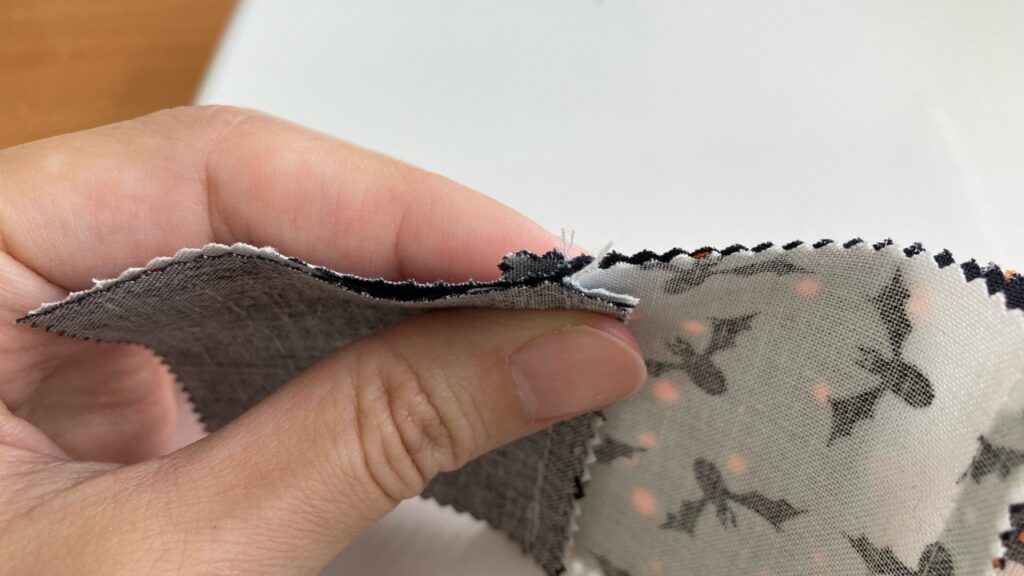
こうすることで次に長い辺を縫う際、縫い代がピタッとかみ合います。
By doing this, when you sew the next long side, the seam allowance will fit snugly.
縦にも繋げて、縫い代は上から下に一方向に倒します。
Sew them together and press the seam allowance in one direction from top to bottom.
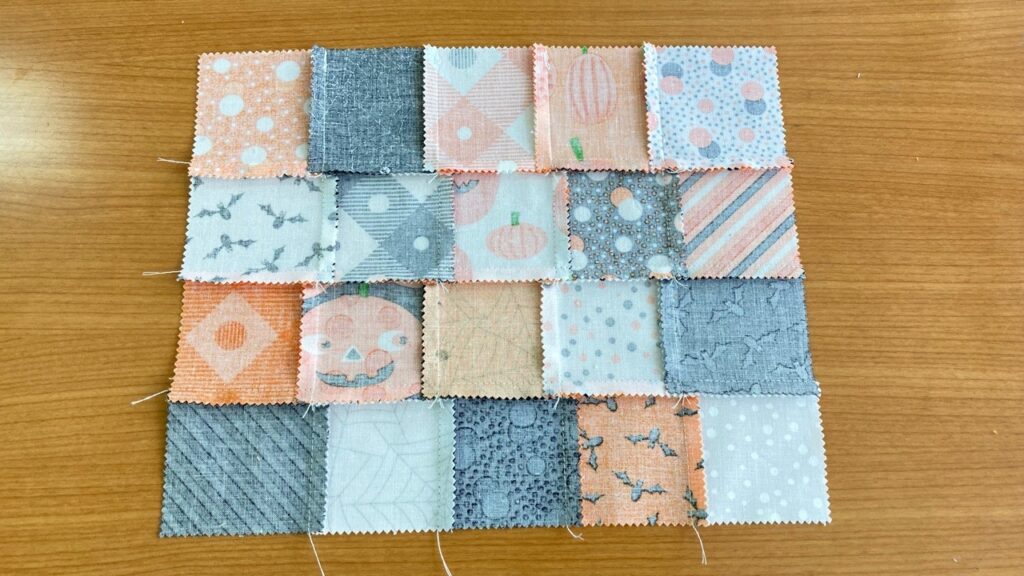
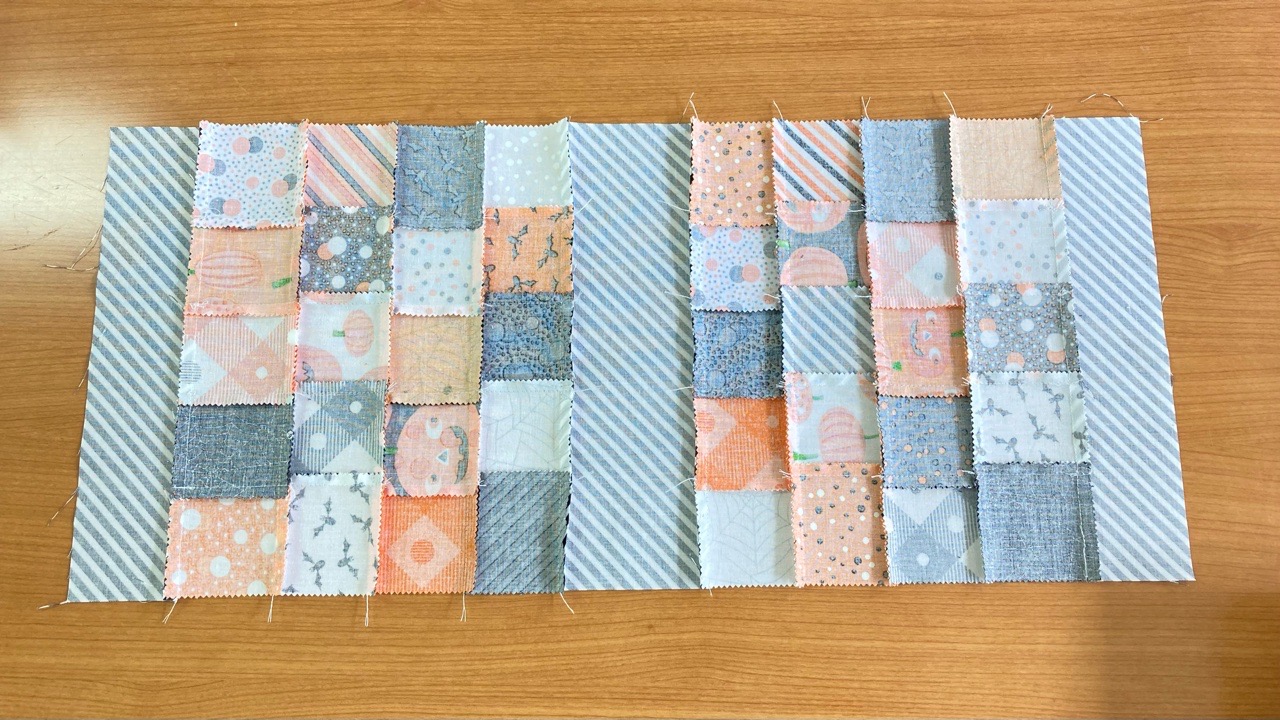
もう一セット、同様に作ります。
Make one more set as well.
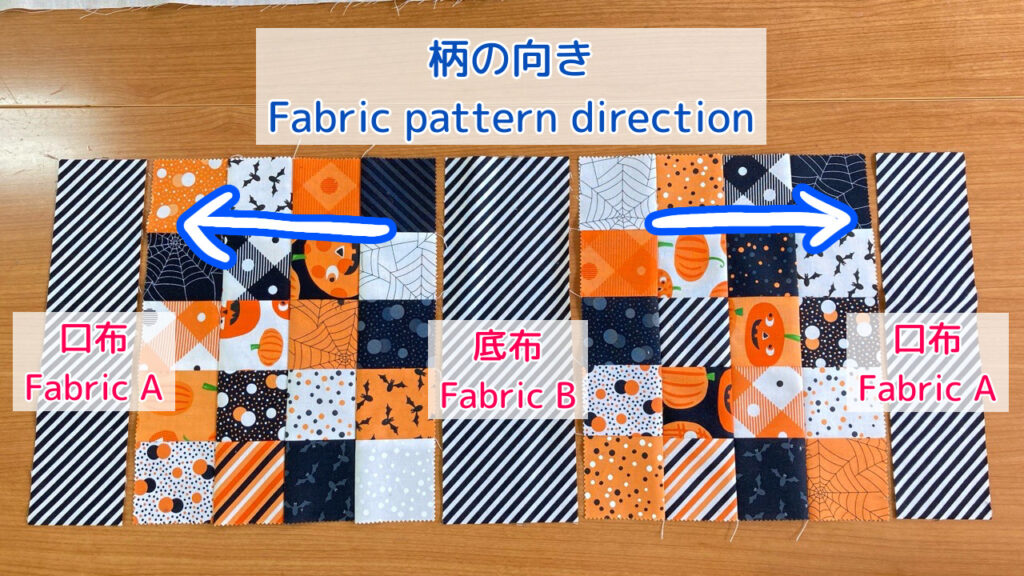
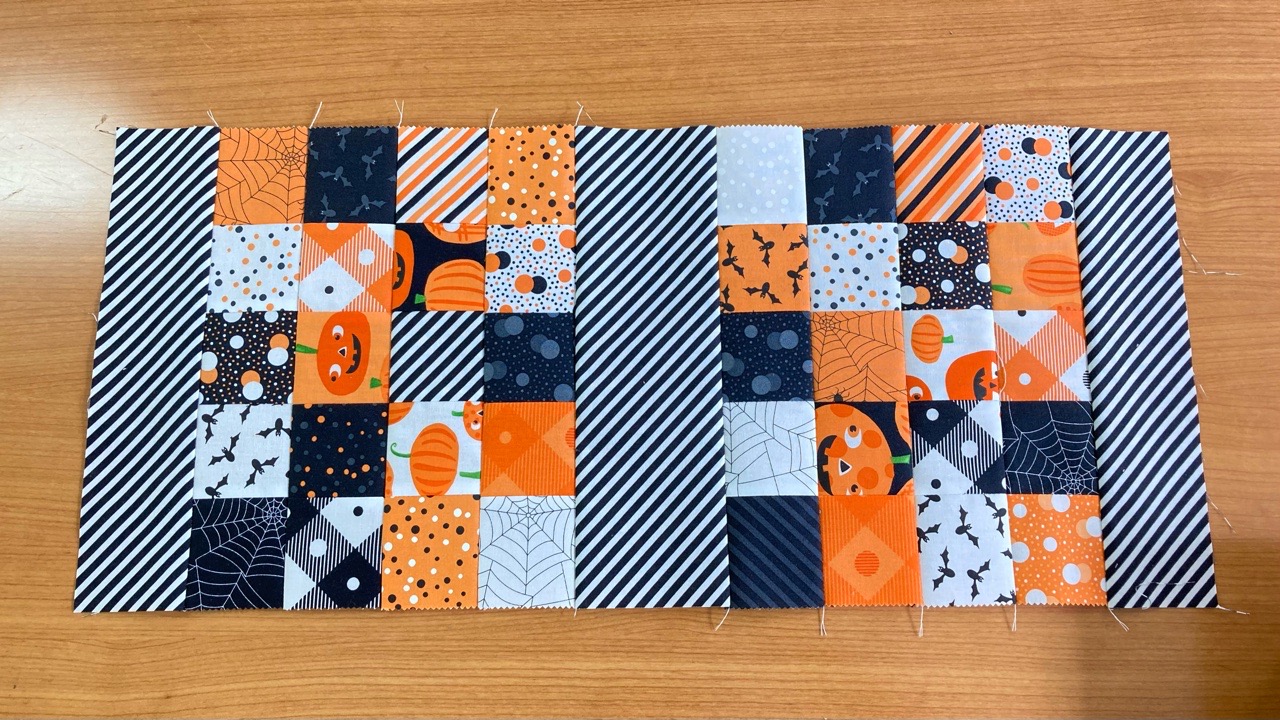
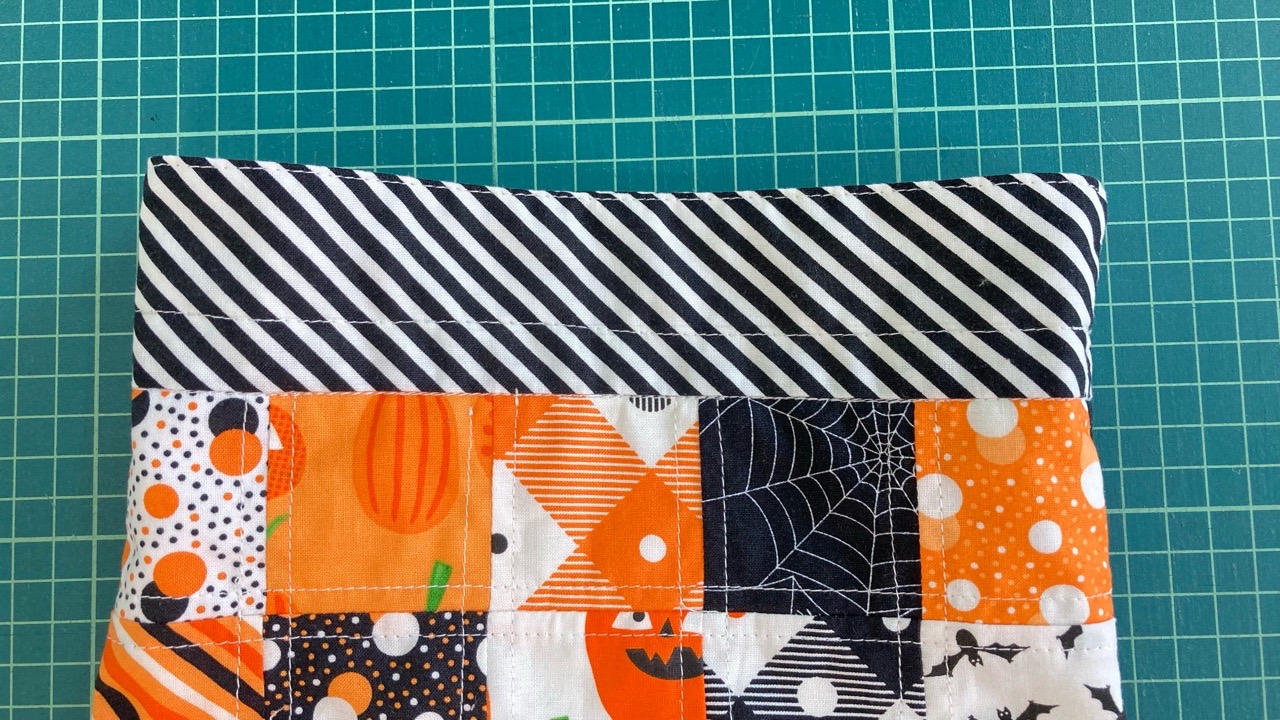
口布と底布をつける Sew top and bottom fabrics
がらの向きに注意して、ひも通し用の口布と底布を縫い合わせます。
Sew the top fabric and bottom fabric together, while paying attention to the direction of fabric.
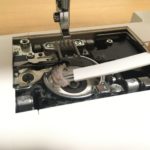
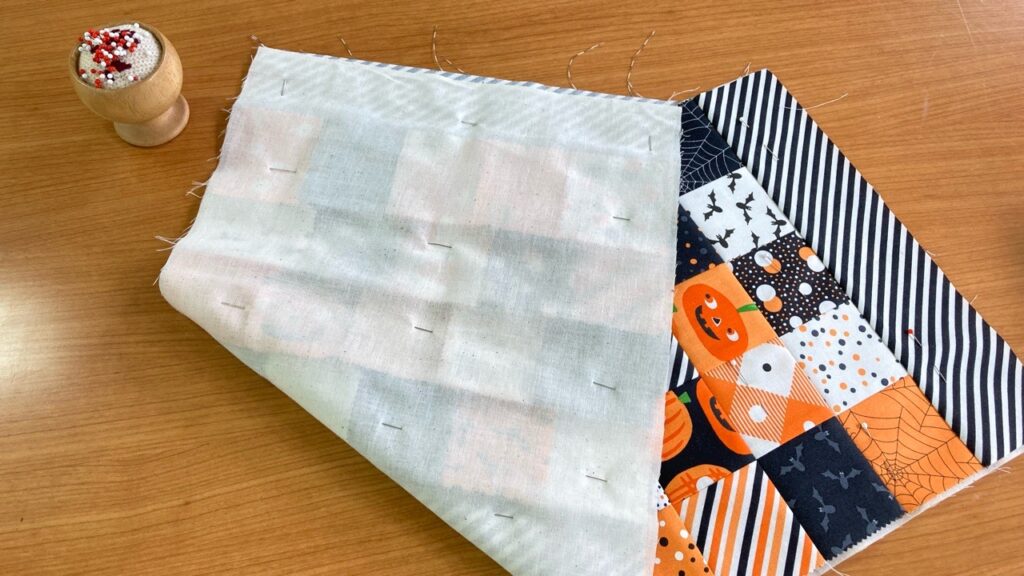
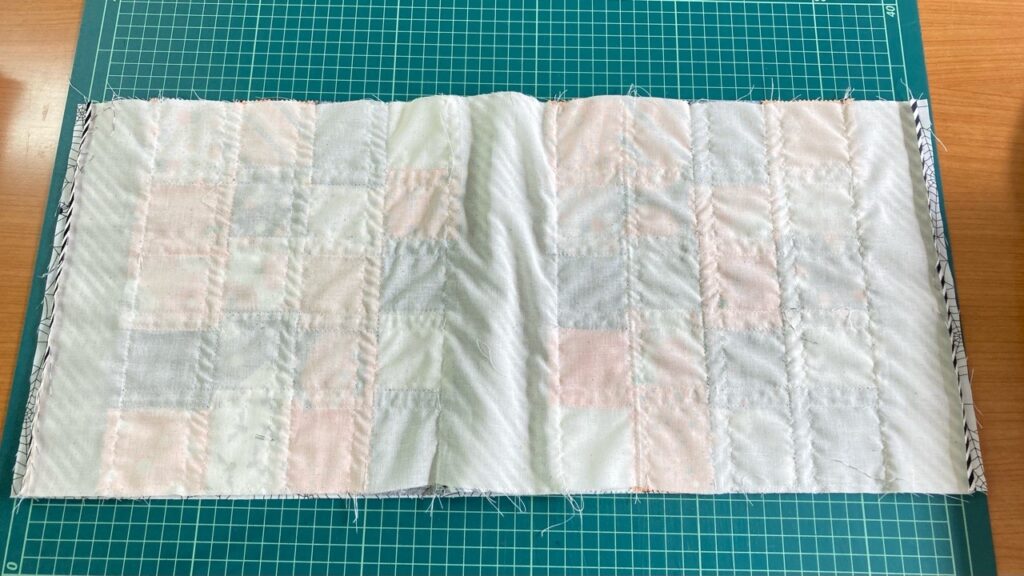
裏打ち布と合わせてステッチする Stitch with thin cotton lining
縫い代を抑えるために、裏打ち布(捨て布)と合わせてステッチをかけます。縫い目から5mmくらいのところにステッチしました。キルト綿と合わせてキルティングしてしまうと分厚くなって紐で縛りにくくなるため、今回は裏打ち布を使って薄手の仕上がりにしています。※本体にキルト綿が入っている場合の巾着の作り方は何パターンか方法がありますので、また順次ご紹介していきます♪
To settle the seam allowance down, stitch together with the lining fabric C. I stitched in 1/4 inches from the seam. Quilting with batting will make it thicker and harder to tie with string, so this time I used a lining cloth to make it thin. *There are several ways to make a drawstring bag with quilted cotton in the main body, so I will introduce them in future.

内袋と縫い合わせる Sew with fabric for inner bag
まずは上で縫いつなげた表地の実寸を測ります。その寸法に対して、(実寸長さ-5mm)×(実寸幅)のサイズで内袋布をカットし微調整します。※表地と同じ寸法だと内袋があとでごわついてしまいますので、少し小さめにしておくと綺麗に仕上がります。
Measure the actual size of the outer material sewn together above. For that dimension, cut the fabric D (for inner bag) to the size of [subtract 1/8-1/4 inches from actual length] x [actual width] and make fine adjustments. *If the size of inner bag is the same as the outer bag, the inner bag will become oversize later, so make it a little smaller for a beautiful finish.
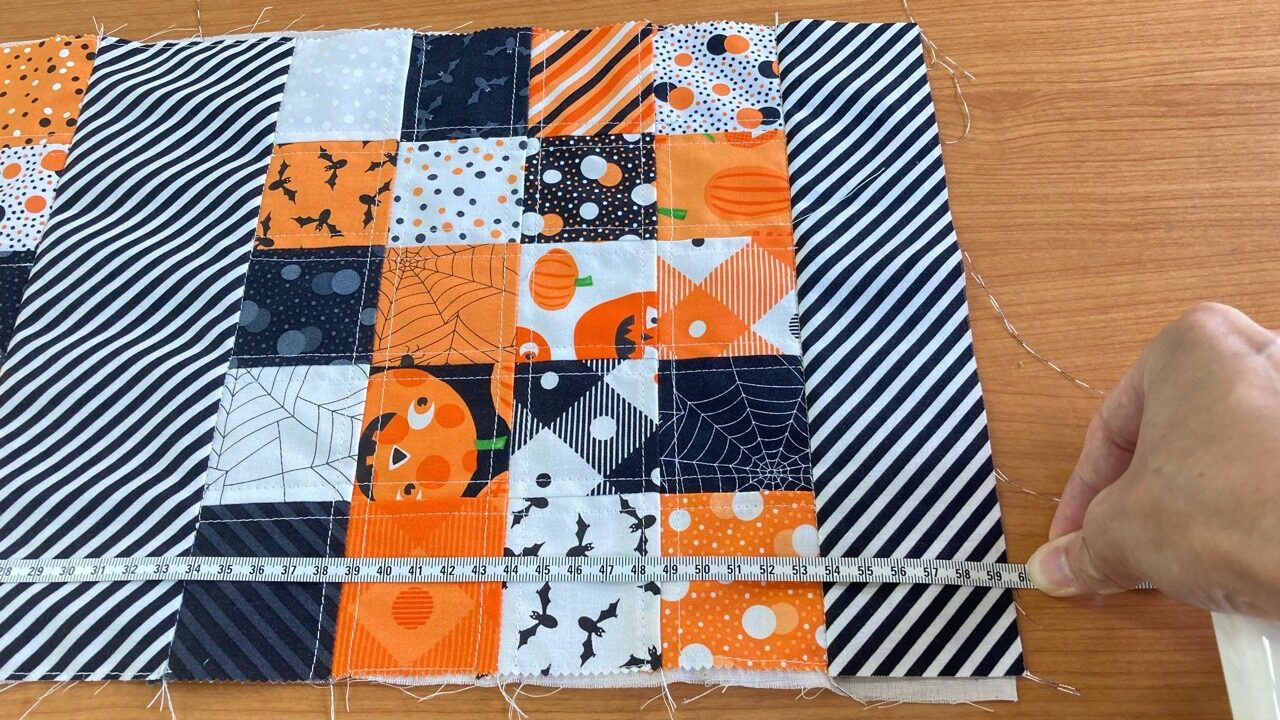
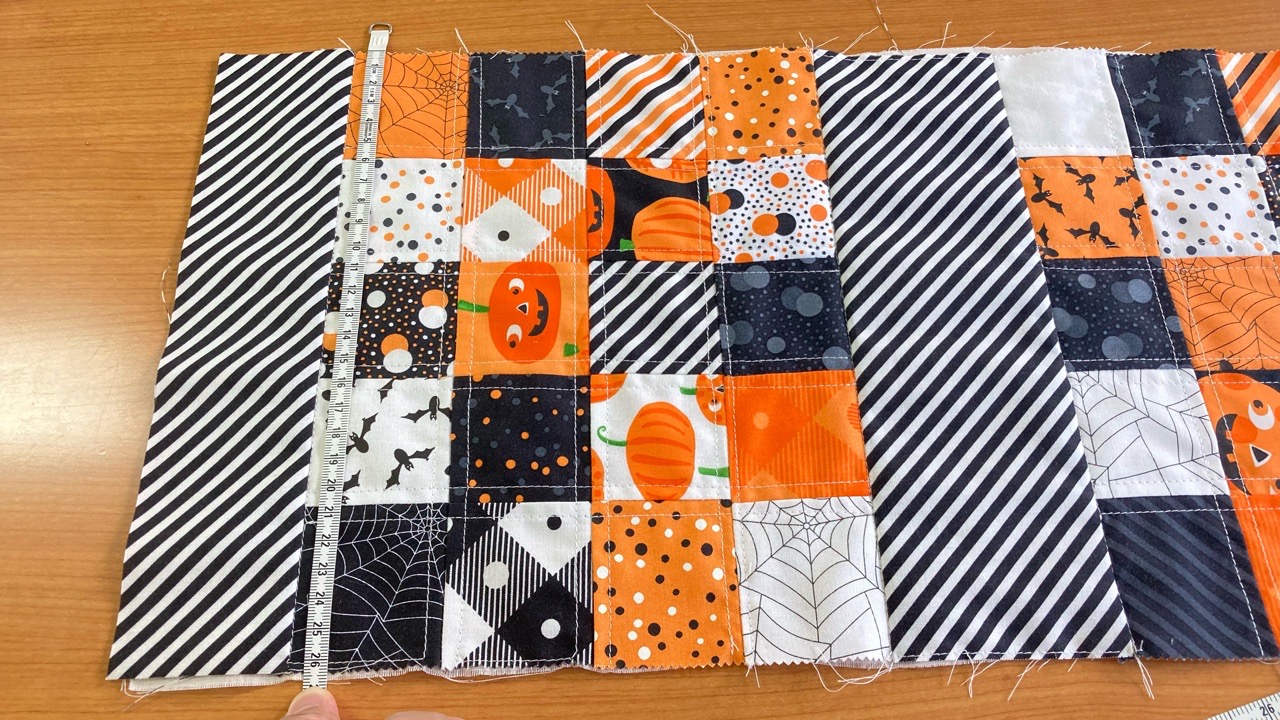
※私の場合だと、表地が長さ59.5cm×幅26.5cmの実寸で仕上がっていたので、長さ59cm×幅26.5cmで内袋布をカットしました。
In my case, the outer was finished L 23 1/2″ x W 10 3/4″ , so I cut the fabric D for inner bag to about L 23 3/8″ x W 10 3/4.
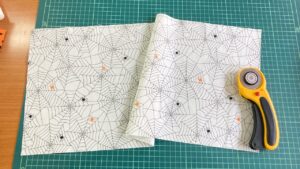
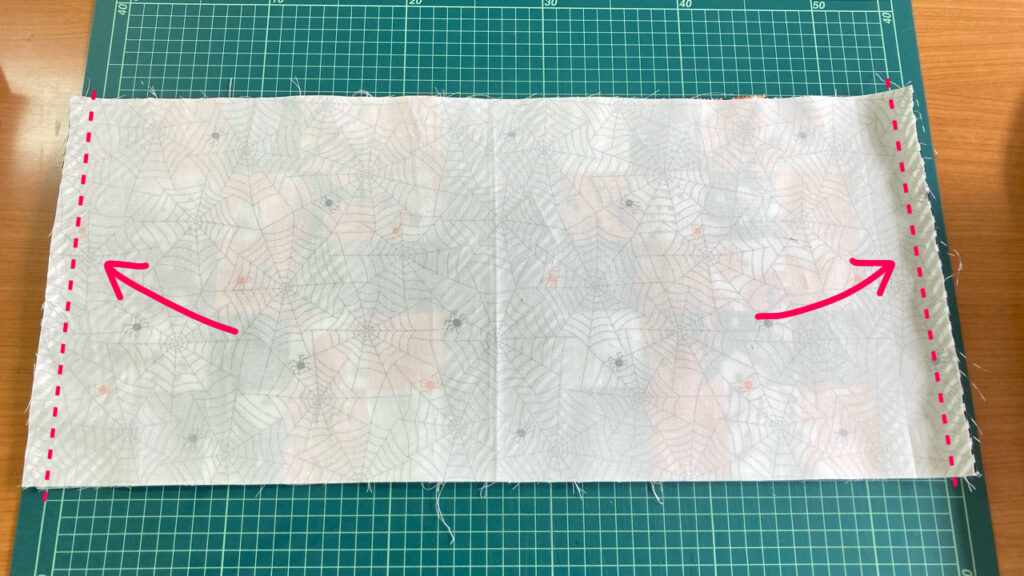
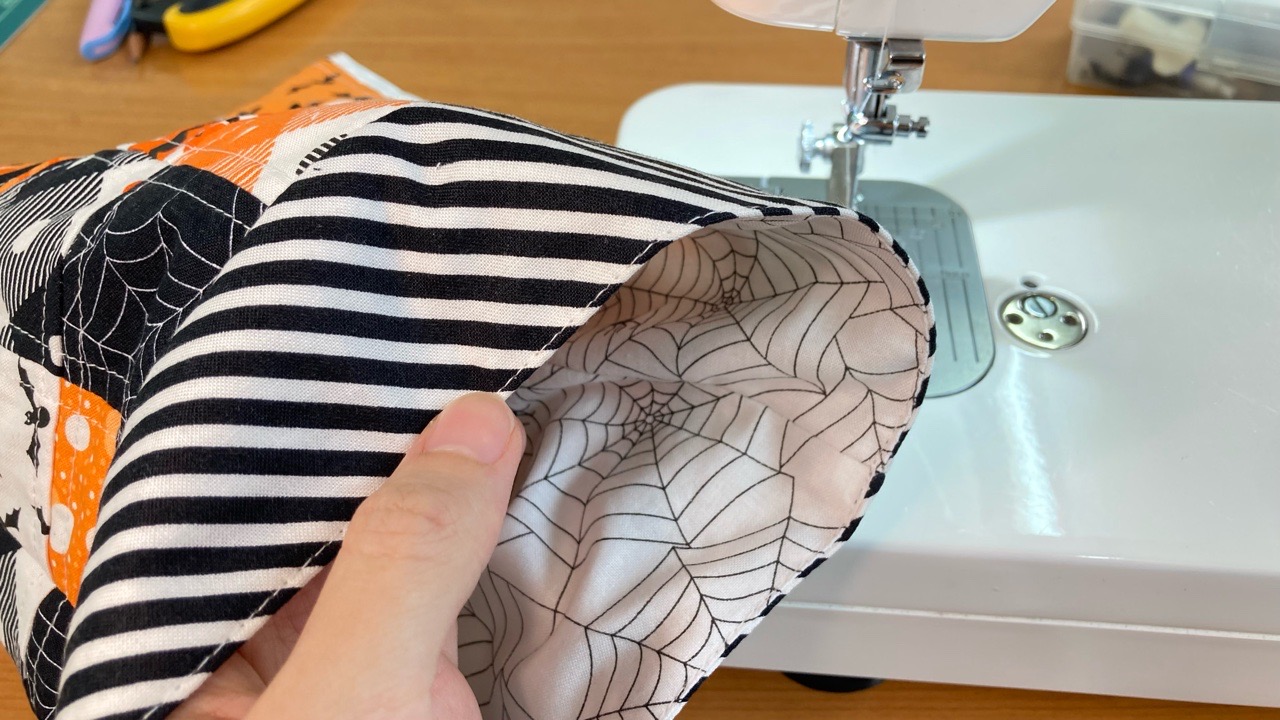
表地と内袋布を中表に合わせ、生地端を合わせながら口部分を2か所縫います。
With the front sides facing each other, align the outer fabric and the inner bag fabric, sew the top in two places while aligning the edges of the fabric.
縫い代をアイロンで割ります。
Press the seam allowance open.
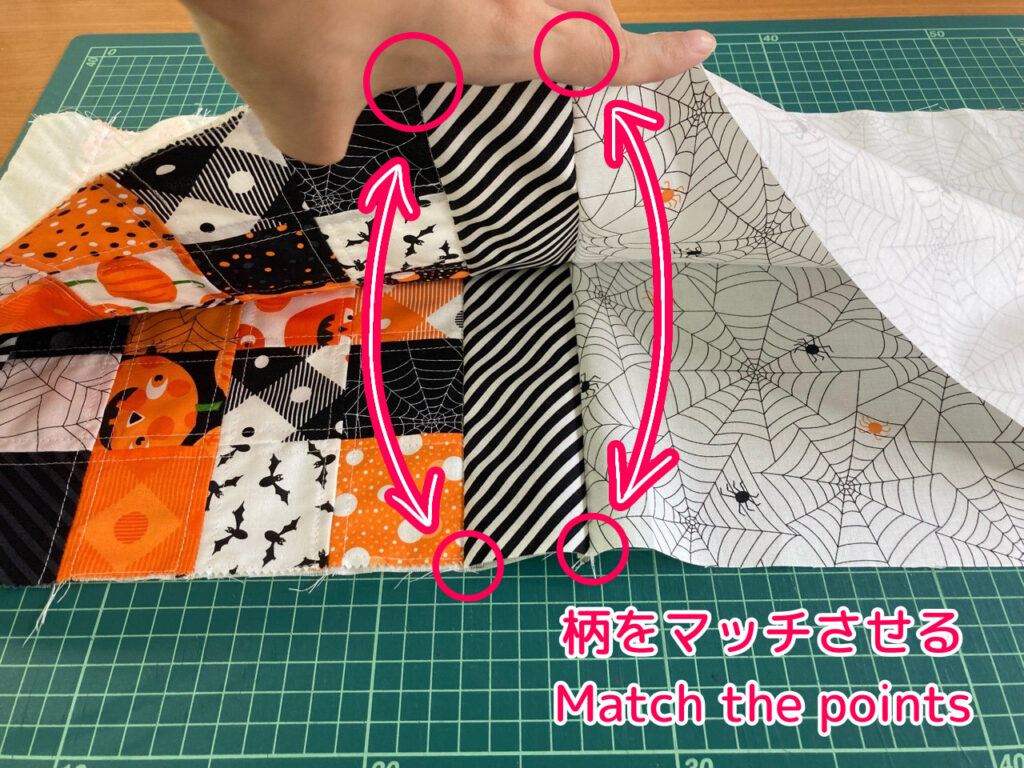
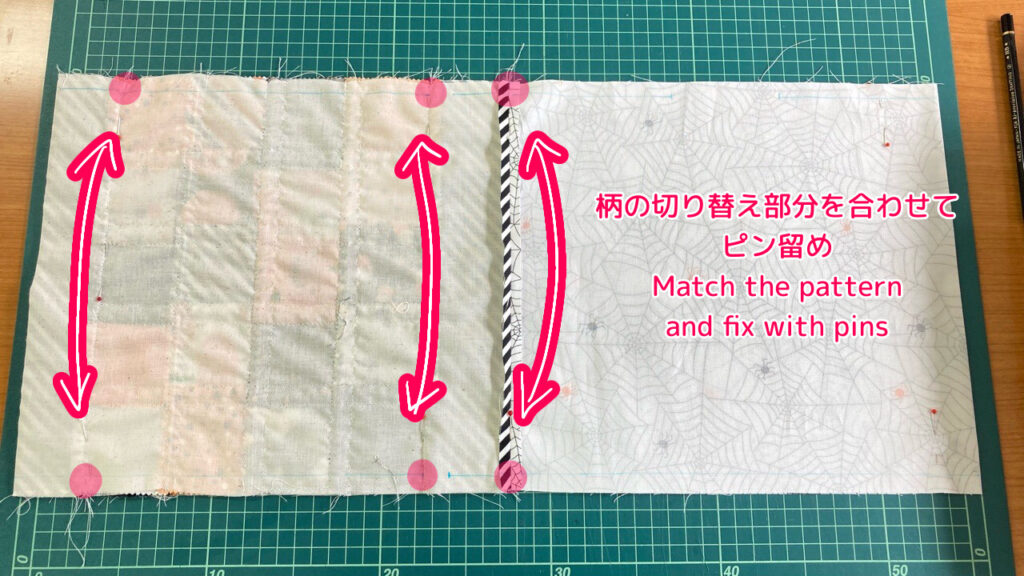
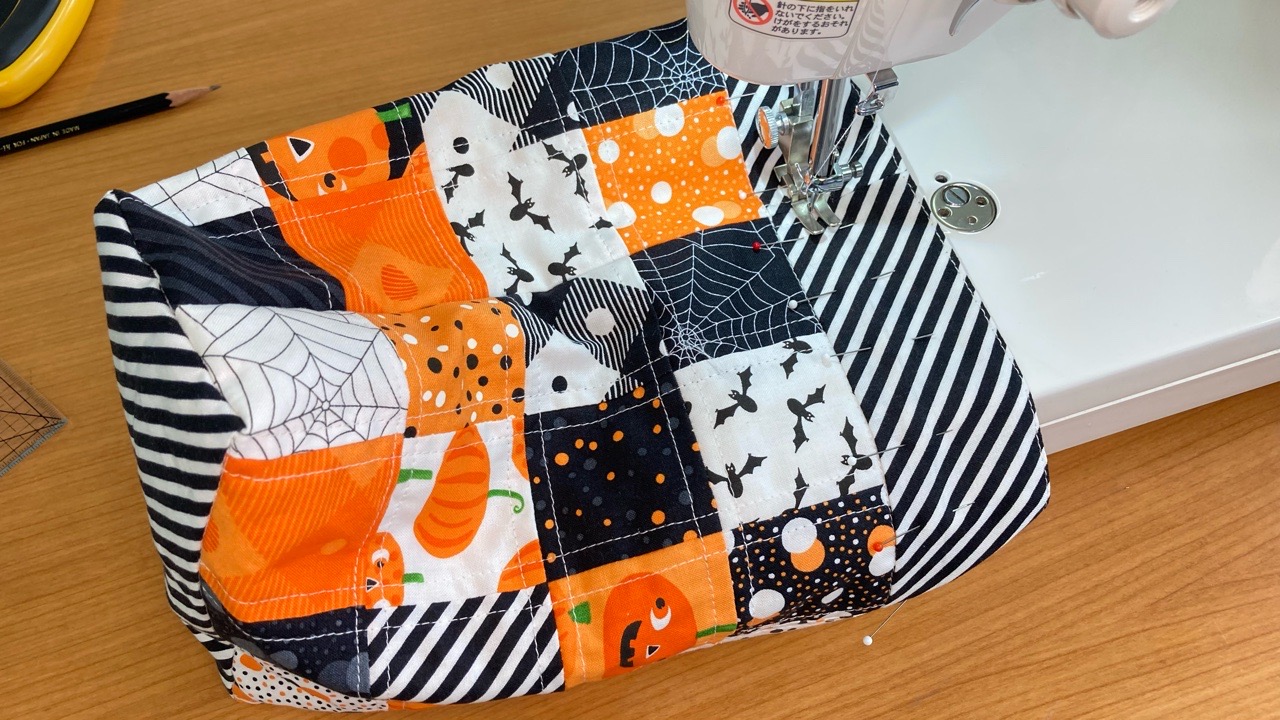
表地どうし、内袋どうしを中表に合わせ、中心を待ち針で固定します。口布および底布とピースワーク部分との切り替え部分も合わせておくとよいでしょう。
With the front sides facing each other, align the outer fabric and the inner bag, and fix the center with a pin. It is also good to match the transition between the top & bottom fabric and the piecework.
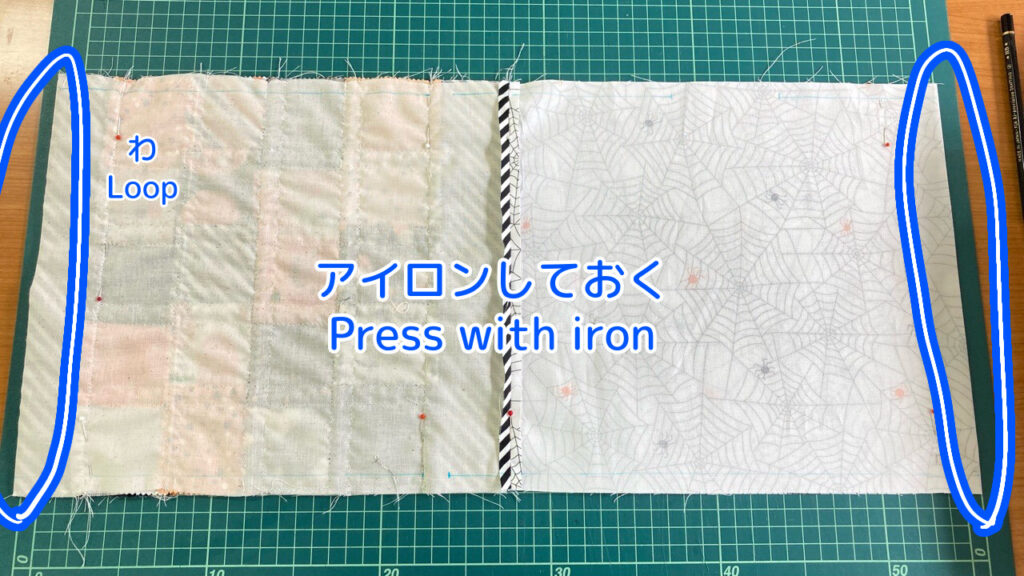
両側の輪の部分にアイロンをかけておくと後で便利です。
Press the loops on both sides for the centerline of bottom.
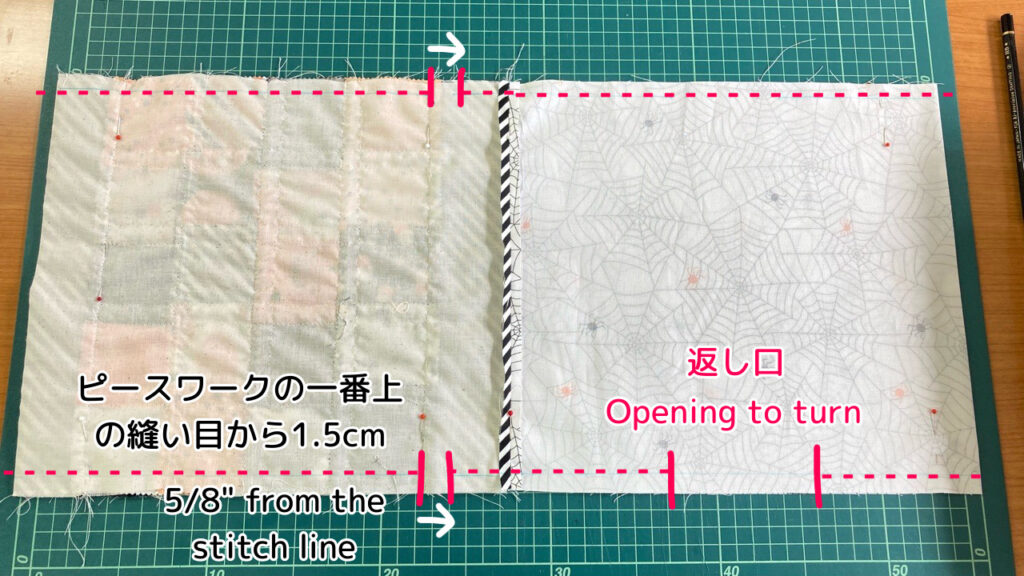
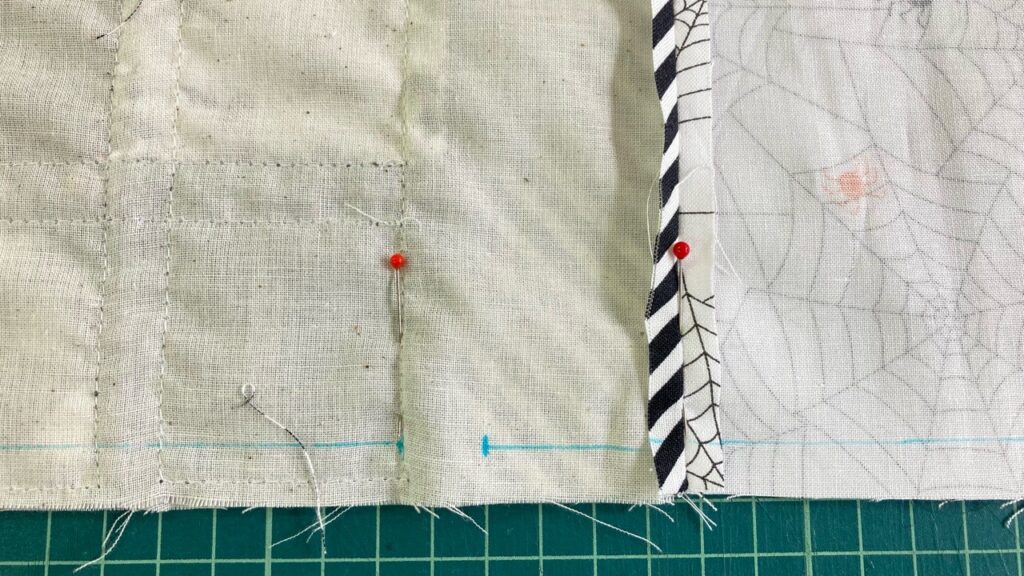
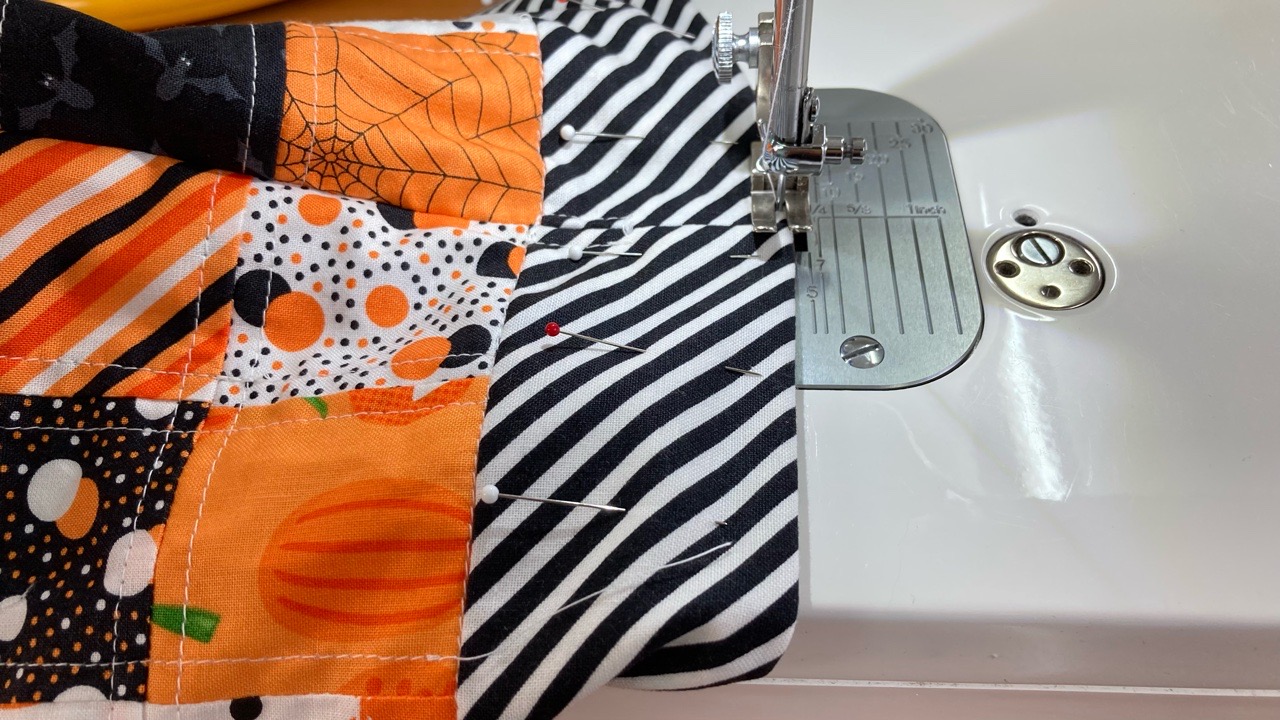
両脇を縫い代1cmで縫います。表地には2か所のひも通し部分を縫い残しておき、内袋のほうは1か所の返し口を残しておきます。ひも通し部分は、ピースワークと口布の切り替えの縫い目から1.5cmのところに印をつけます。(※ひもが太い場合はひも通し口を2cmにしてください。)
Sew both sides with a 1cm seam allowance. Leave two places for the cording channel open on the outer bag, and leave one opening for turning on the inner bag. For the cording channel, mark 5/8 inches from the seam where the piece work and fabric A are connected.
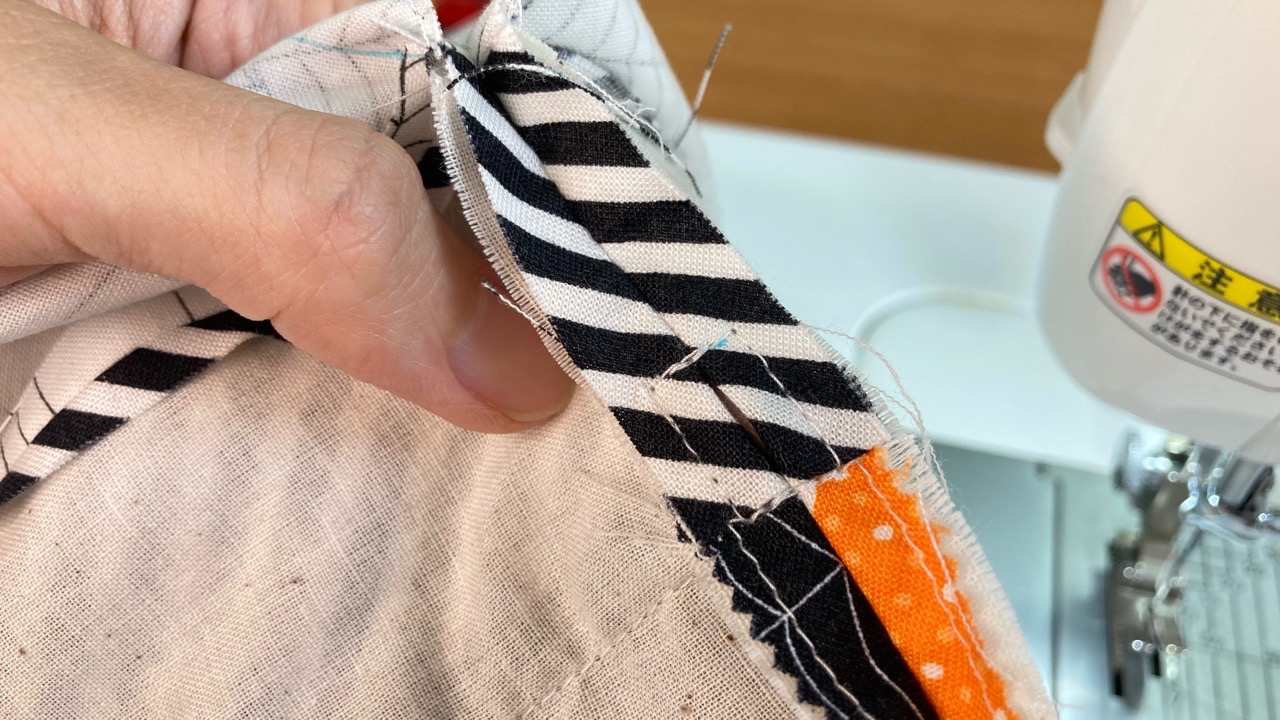
★先に表地の両端を中心から縫い、縫い代を割り、ひも通し口の周りにステッチをかけておくと後々ひもを通しやすくなります。
If you sew both sides of the outer bag from the center first, open the seam allowance, and stitch around the cording channel , it will be easier to thread the cording later.
縫い代はアイロンで割っておきます。
Press the seam allowances open with iron.
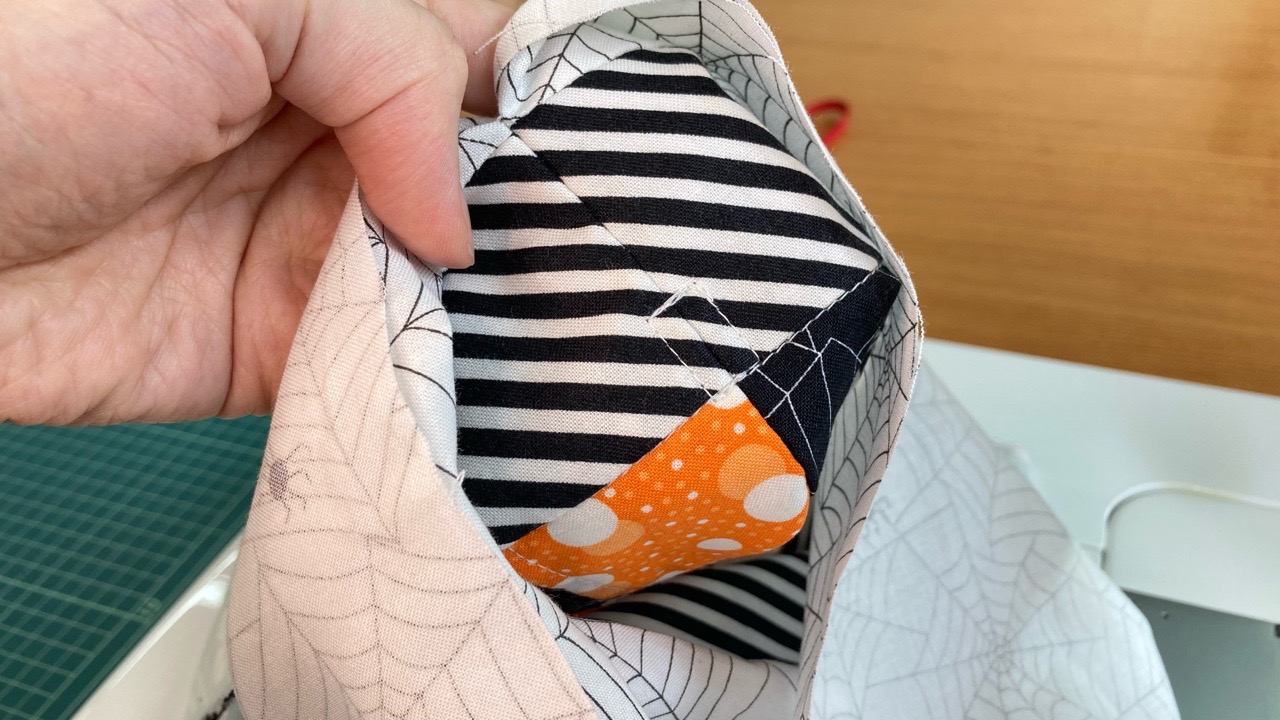
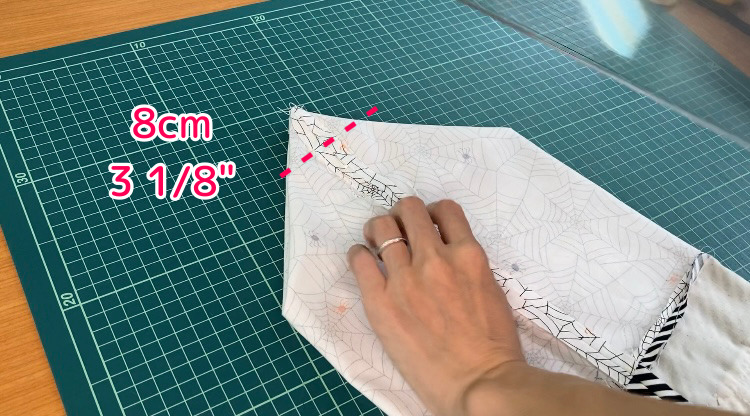
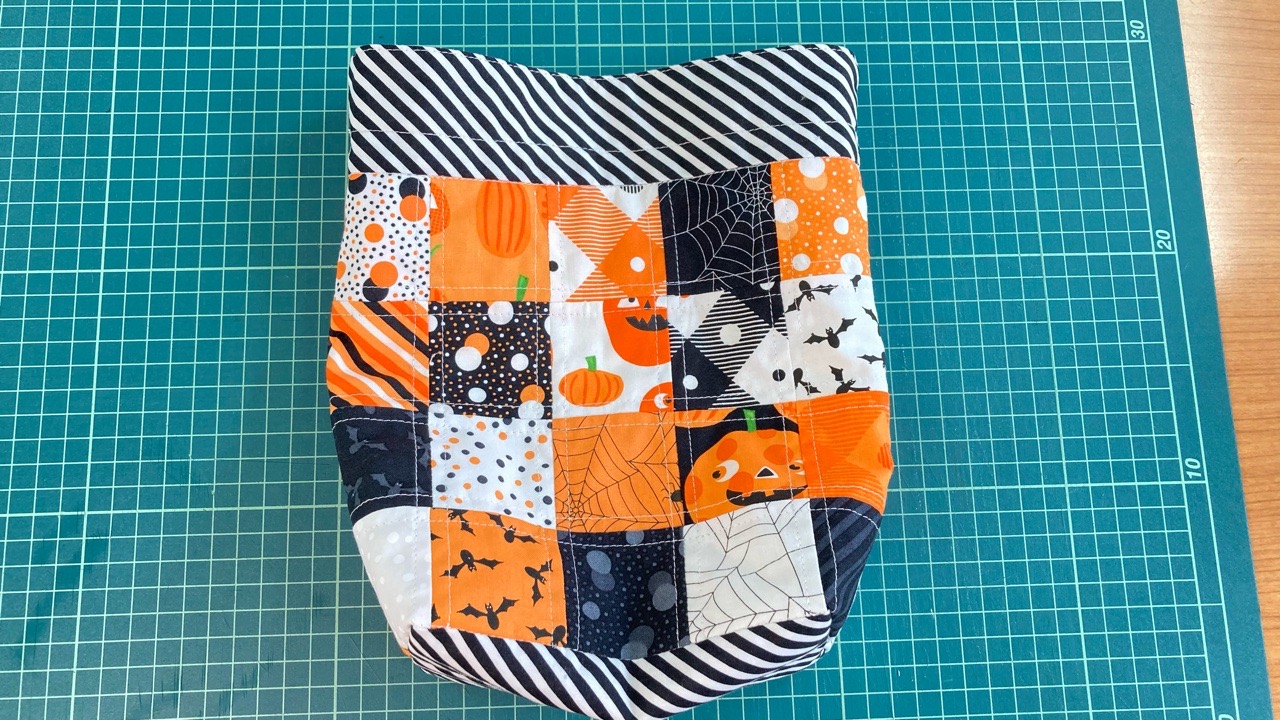
底マチをつくる Make the boxed bottom
表地の2つ角と、内袋の2つ角の計4か所をつまみ、8cmの底マチを作ります。中心を合わせてピンでとめ、中心から4cmずつになるように中心線と直角に線を引いて縫います。
At each corner, make 3 1/8 inches bottom gusset. Draw a horizontal line perpendicular to the centerline of equal length from the center, and sew on the line.

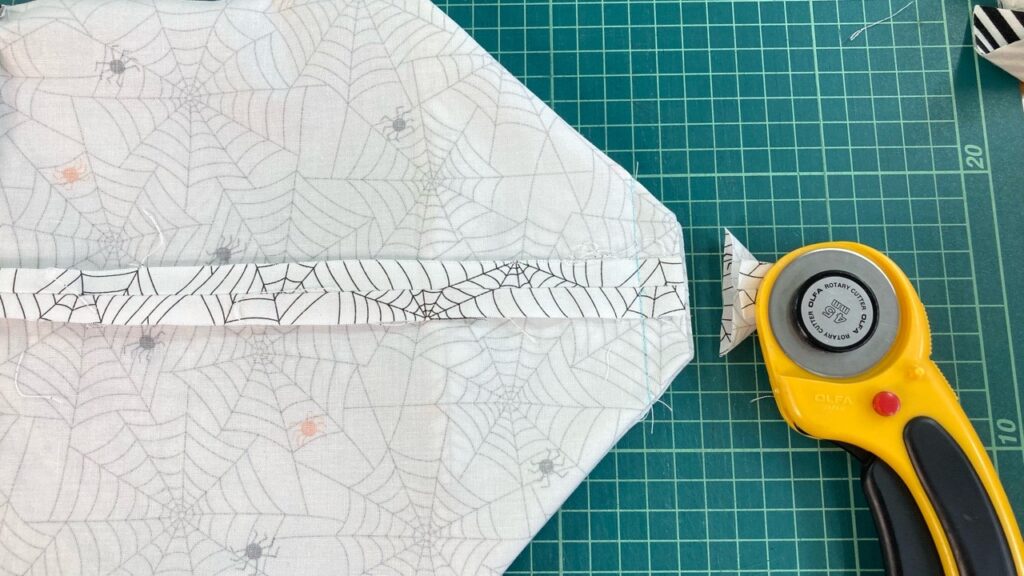
縫い目から1.5cmくらいのところで余分をカットします。
Cut out corners 1/2 inches from the seam.
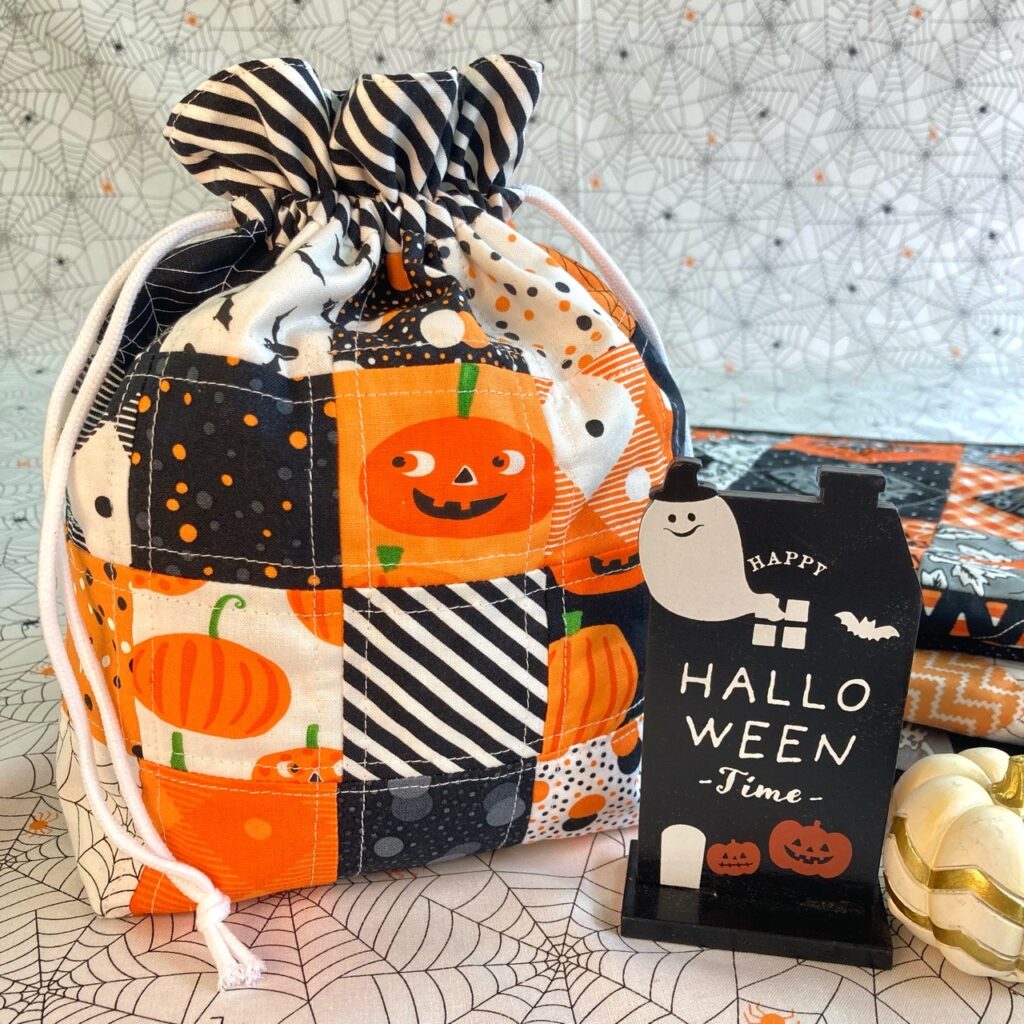
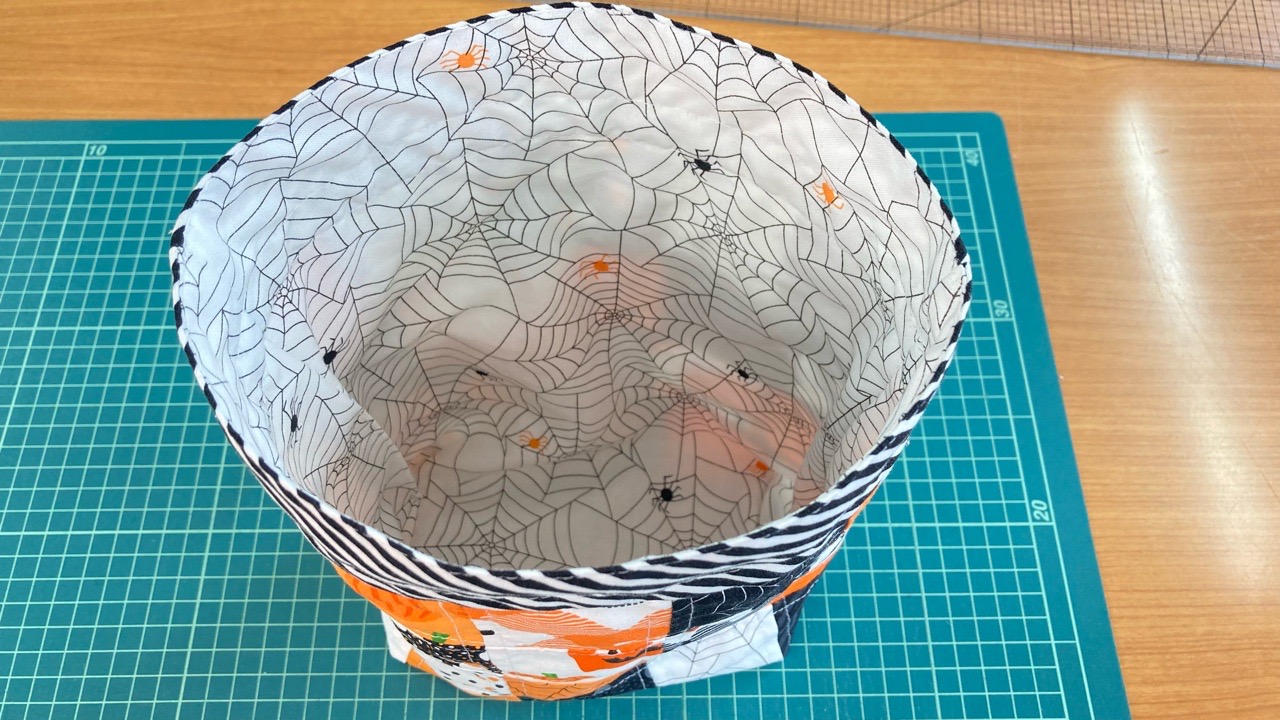
仕上げのステッチ Finishing Stitches
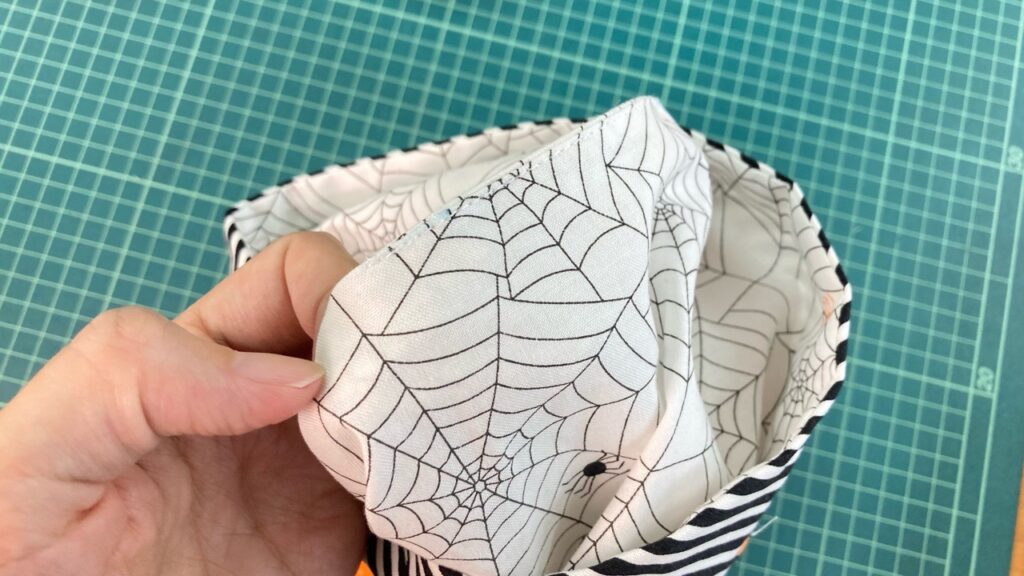
返し口から表に返して、返し口を閉じます。
Turn the bag right side out and sew the opening in the inner bag closed.
底マチの角をきれいに整え、袋口のキワを丁寧にアイロンしたら、ピン留めをして端ミシンをかけます。
After neatly arranging the corners of the bottom gusset and carefully ironing the edge of the bag opening, pin it and sew the edges.
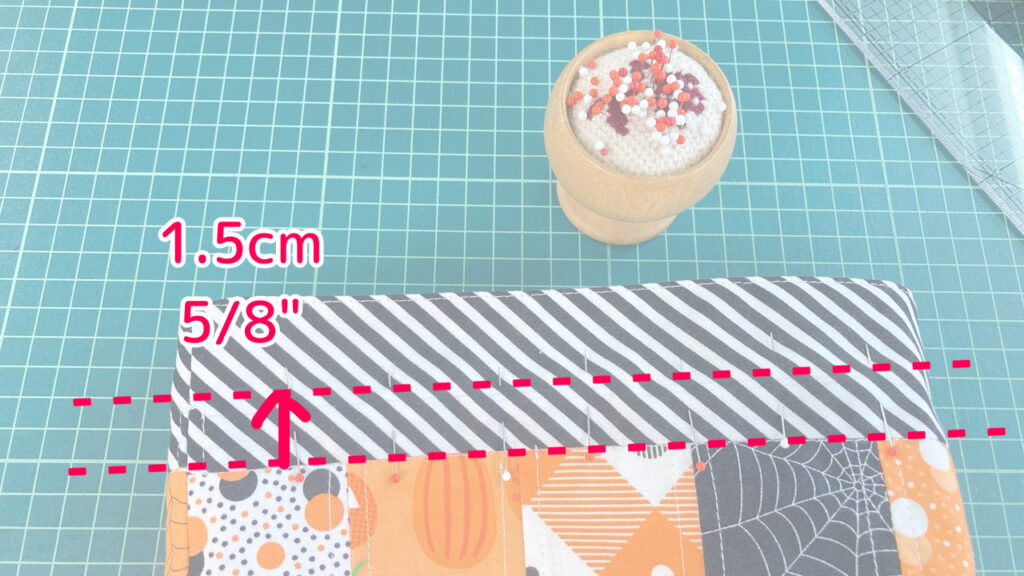
続いて、ひも通し部分も2本ステッチをいれます。1本目はピースワークと口布との切り替え部分の上に、2本目は1本目のステッチから1.5cm(または2cm)のところにステッチをかけます。
Next, stitch two lines of the cording channel. Stitch the first line over the transition between the piecework and the opening fabric, and stitch the second line 5/8 inches from the first line.
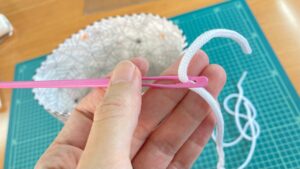
ひもを通してできあがり!
Thread the cording through the channels!


☆材料は「ぱいなオンラインショップ」で購入できます。デザイナー”Me and My Sister Designs”さんの布生地ページはこちら
Please comment or message me if you need translations or any help for other blog pages. Thank you!
Email: contact(@)quiltshoppineapple.com